
I created this project for Purple Cows some time ago and it's finally been published on the Purple Cows blog and website.
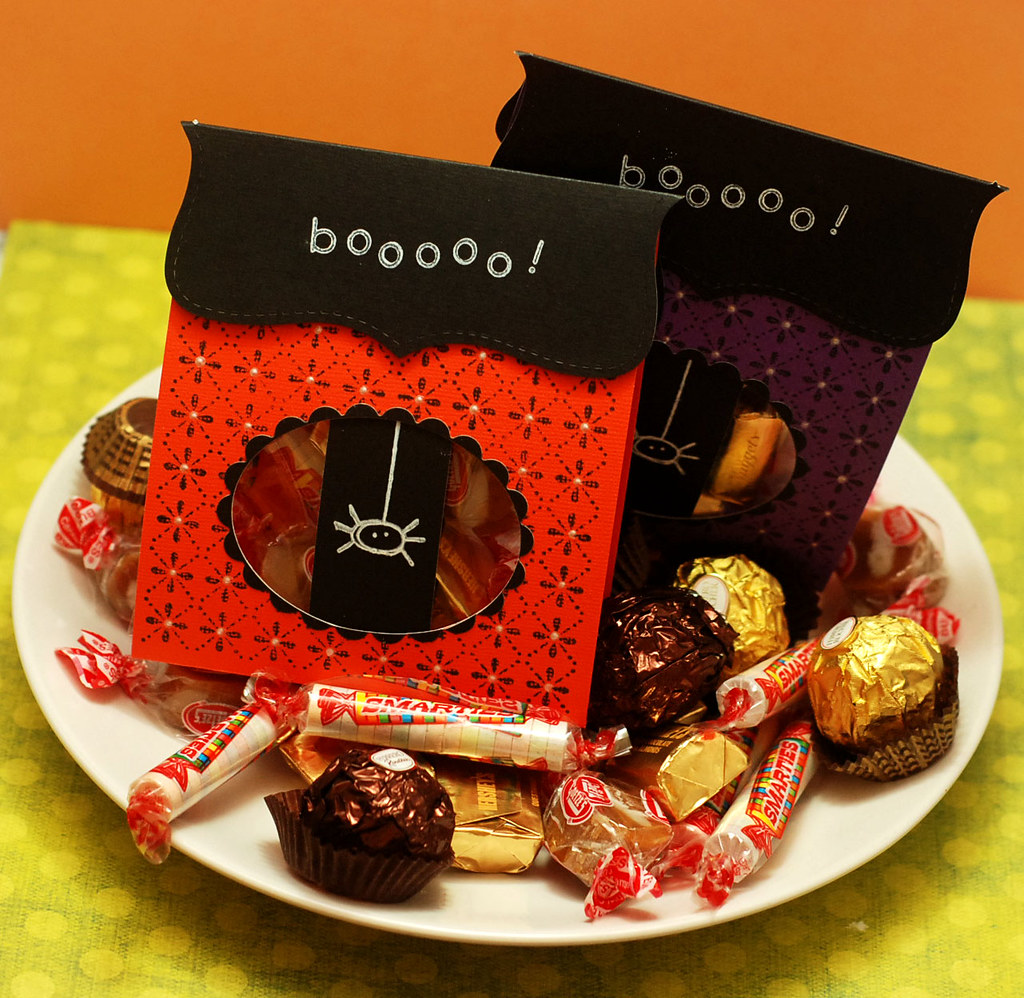
These are fast and so simple to make! So much fun! Just change the colors and theme up and you've got a treat/favor bag for any occasion!
Here's how to make your own:
Tools:
Purple Cows 1040 2 in 1 Cutter, Cuttlebug, Oval Nestabilities, Oval Scallop Nestabilities
Supplies:
Glue Arts Glue Glider Pro, Stampin Up! Top Note Die, Papertrey Fresh Snow Ink, Color Box Chalk Ink - Black, Ranger White Opal Liquid Pearls, Clear Acetate, Close to My Heart My Acrylix Seasonal Thoughts, Hero Arts Alphabet Stamps, Hero Arts Dots and Flowers, Clear Baggies
Step by Step Instructions:
- Cut 12x12 colored cardstock into 4.25”x 12” with Purple Cows 2 in 1 Cutter (1040)
- Stamp desired background with Color Box chalk ink – black.
- Accent with Ranger White Opal Liquid Pearls.
- Cut oval and scallop oval frame with Cuttlebug.
- Cut a strip of black cardstock into 3”x 1.25”.
- Stamp spider image with white ink.
- Adhere to front with Glue Glider.
- Cut Stampin’ Up Top Note die with Cuttlebug.
- Stamp sentiment with white ink. Fill clear baggies with candy and treats.
- Adhere clear baggies with Glue Glider.
- Assemble and secure Halloween Grab Bag with Glue Glider.
Remember to support me in a little contest and be eligible to win a big box of scrappin' goodies. I've been slowly putting the box together and I guarantee you will not be disappointed! It's already filled with a ton of patterned paper, embellishments, stamps, ribbon, etc.!
1) Visit the blog http://sadiepurplecow.blogspot.com/
2) Become a follower
3) Leave a comment on any post "Kryssi sent me!"
OR
Become a fan on Facebook and let them know Kryssi sent you!
these are so cute! thanks for the instructions! I'll definitely try this! Take care of yourself and I am looking forward to see the photos your little baby princess!! sending hugs... =)
ReplyDeleteOmgosh these are cute! great instructions...will be trying this out for Xmas :) THANKS!
ReplyDeleteahhh...super cute project...
ReplyDeletethese are AWESOME!
ReplyDeleteSo Cute Kryssi...Love your little treat bags!
ReplyDeleteAdorable bags. So sweet. Keep your feet up and rest as needed. :)
ReplyDeleteThese look brilliant Kryssi! Hope all is well, you are on the home stretch now sweetie, Jo x
ReplyDeleteSuper cute!!
ReplyDeleteHi Kryssi, just stopping by to say that it's been an honor being on the same dt as you. I've really admired your work and hope that we cross paths again. Take care! Adela
ReplyDeleteI love simple treat boxes like this! Perfectly done!
ReplyDeleteVery cute......I am sure you had fun making these.
ReplyDeletesuper cute Kryssi!
ReplyDeleteWhat great treat bags!! They are soooo cute!!!
ReplyDeleteThese are sooo CUTE!!
ReplyDeleteRest well and take care ya!
Very cute, the perfect Halloween project. take care.
ReplyDeleteHello girl! How is everything? Hope all is well! I just left you some love over at my blog, please come and check it out whenever you can! Have a beautiful weekend!
ReplyDelete